Group Manager Tools
Note: Group Managers have elevated permissions have access to manage group page info and review group event submissions based on group settings.
Request User Permissions
As a group manager, you can request to add additional Group Managers or Event Authors to your group. If you are not the group manager or unsure, please check with your supervisor before submitting your request. Request permissions
Edit Group Page
- Access your Admin Dashboard by logging into the calendar website and clicking on “Administration” on the top right of the page next to your name.
- On the Dashboard screen you will see your menu options on the left. Click on "Classifications" to open the dropdown menu and click "Groups".
- Search for your group and click the group name to access the group page editor.
- Update fields and click "Save Changes" at the bottom right to save your changes.
- Click "View Group Landing Page" on the top right to review your page updates.
Review and Approve Your Group Events
If your group permissions require approval before an event is published on the live website, follow the steps below to review pending events or watch this video from Localist for a deeper understanding of pending events.

- Log into your UC San Diego Calendar Admin Dashboard by clicking on “Administration” on the top right of the page next to your name.
- On the left, open the “Events” dropdown menu and click on “Pending (#)” to see a list of pending events to review.
- Click on one of the three options on the right.
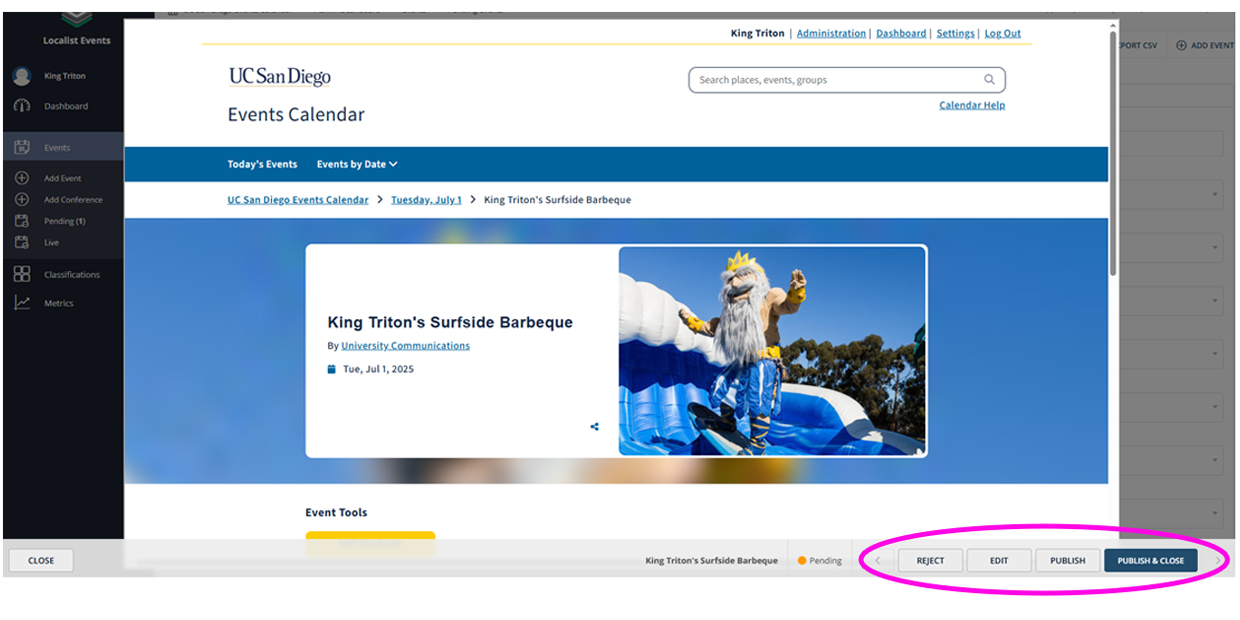
- Review: Opens up an in-page view of the event to review. Use the tool bar on the bottom right to reject, edit, publish and preview other pending events.

- Edit: Opens up the event editor in the admin dashboard. Make your updates and when ready click on “Pending” at the top right and update to “Publish”. The event requestor will receive an email notification that their event is now published.
- Reject: Enter why you are rejecting the submission and click “Send message and reject event” to send an email notification with the rejection message. You can leave this field blank and click “Skip message and reject event” if you want to reject without providing a notification.
- Publish: If the event is fine as is, click “Publish” to publish directly from this in-page view.
- Approve: Publish the event without reviewing.
- Reject: Enter why you are rejecting the submission and click “Send message and reject event” to send an email notification with the rejection message. You can leave this field blank and click “Skip message and reject event” if you want to reject without providing a notification.
- Review: Opens up an in-page view of the event to review. Use the tool bar on the bottom right to reject, edit, publish and preview other pending events.
Are your group events are not showing up in your pending queue?
Please confirm with the person submitting the event that they are selecting the correct group type in the 'Groups' field in the event editor. If the correct group is not selected, the event will not appear for you in the pending queue.
