Review Pending Events
Note: Only for Group Managers that are part of a Group that requires events to be reviewed before publishing.
Watch this video from Localist for a deeper understanding of reviewing pending events or follow the steps below.
- Log into your UC San Diego Calendar Admin Dashboard by clicking on “Administration” on the top right of the page next to your name.
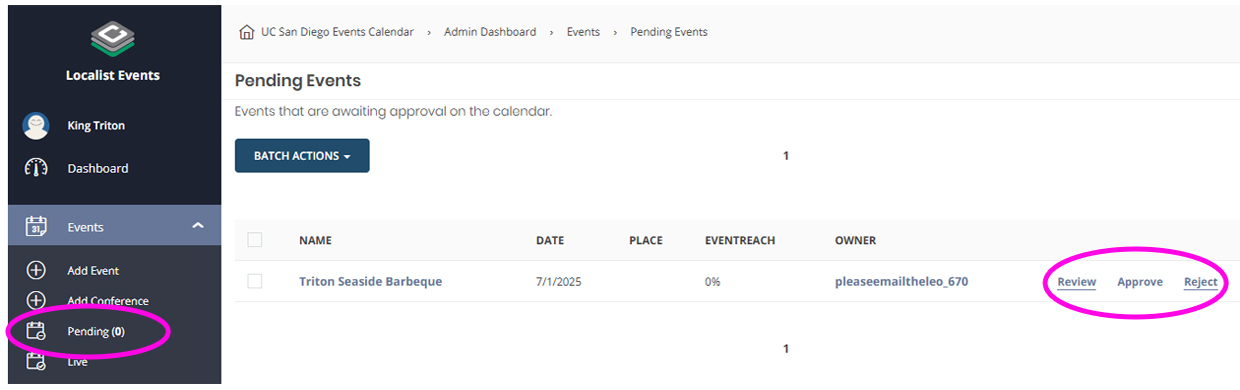
- On the left, open the “Events” dropdown menu and click on “Pending (#)” to see a list of pending events to review.
- Click on one of the three options on the right.
- Review: Opens up an in-page view of the event to review. Use the tool bar on the bottom right to reject, edit, publish and preview other pending events.

- Edit: Opens up the event editor in the admin dashboard. Make your updates and when ready click on “Pending” at the top right and update to “Publish”. The event requestor will receive an email notification that their event is now published.
- Reject: Enter why you are rejecting the submission and click “Send message and reject event” to send an email notification with the rejection message. You can leave this field blank and click “Skip message and reject event” if you want to reject without providing a notification.
- Publish: If the event is fine as is, click “Publish” to publish directly from this in-page view.
- Approve: Publish the event without reviewing.
- Reject: Enter why you are rejecting the submission and click “Send message and reject event” to send an email notification with the rejection message. You can leave this field blank and click “Skip message and reject event” if you want to reject without providing a notification.
- Review: Opens up an in-page view of the event to review. Use the tool bar on the bottom right to reject, edit, publish and preview other pending events.