Create Event: Publish
This section covers the fifth and final step, where you can manage your event’s status, control who can see it and determine where it’s visible.
Select the Fifth Tab: Publish
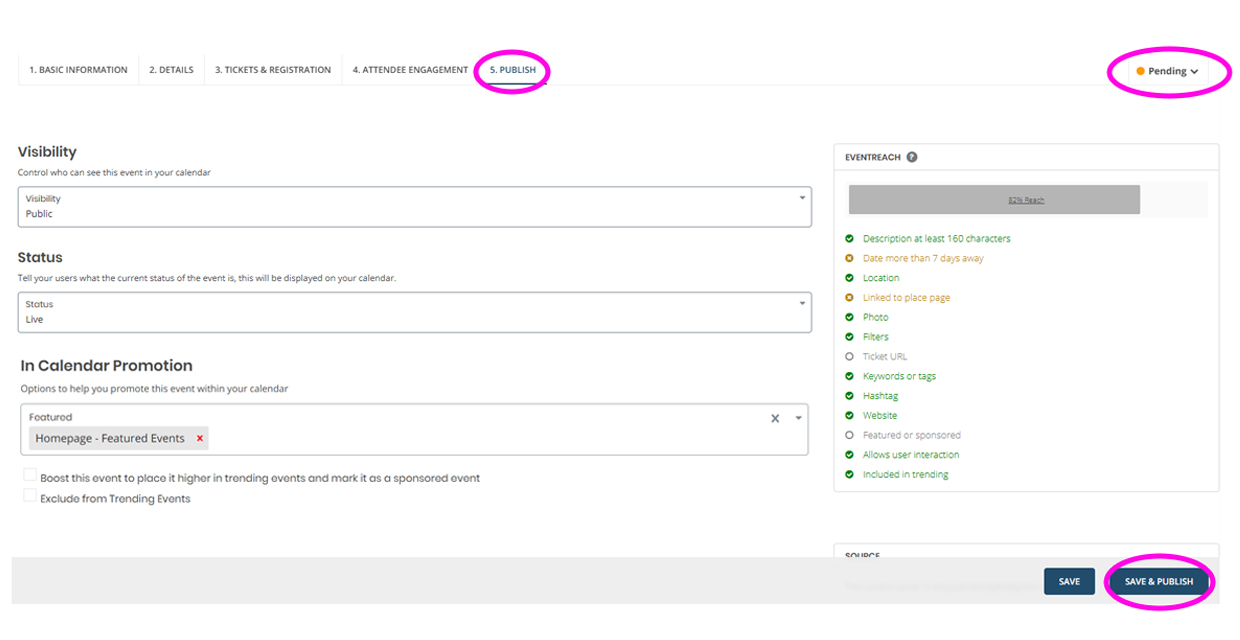
- Review your visibility and event status settings.
- Visibility: Set who can see your event
- Public: Your event will display on the calendar website and any applicable calendar feeds.
- Unlisted: Your event will not display on the calendar website, but can be accessed through the URL.
- Restricted: Users will need to be logged into the platform to view and register for the event.
- Status: Indicate to users the event status
- Use this field to inform users if an event is canceled, postponed, or sold out—without deleting the event page. If the status is anything other than 'Live,' a pop-up message will appear on the event page and listing.
- In Calendar Promotion:
- You can exclude your event from the Trending Events feature on the main calendar site if you want to lower exposure.
- Featured: Based on your permission level, you can add the event to the top featured section of the calendar pages (I.E., Student Life).
- Sponsored Event: Check “Boost this event to place it higher in trending events and mark it as a sponsored event” to boost the event in the trending algorithm. This will help send it straight to the top of the trending list. This feature is only available for certain permission levels.
- Exclude from Trending Events: Check this box if you want to exclude from displaying on the “Trending” tab on the calendar listings.
- Use the checklist in the “EventReach” box to review your event build progress and confirm you’ve entered the key information. You don’t need to complete every item, but the more details you provide, the stronger your event’s reach will be which makes it easier for users to find your event online.
- Click on the “Pending” on the top right of the page and click “Publish” or click on the “Save & Publish” button on the bottom right corner.
- To view your event page, click on “View Event” on the top right.
- After publishing, you will receive an email confirming your event is live.
- Visit the Manage Event help page to learn how to manage your event page as well as your registrations if using the platform's ticketing feature.
Step Guide
Step 5: Visibility
Configure your event visibility.