Create Event: Ticketing & Registration
Event creation is organized into five steps (tabs). This section covers the third step, where you can add your own ticketing link or create a registration using the platform’s tools.
Select the Third Tab: Ticketing & Registration
Watch this video by Localist for an in depth walkthrough of ticketing or follow the steps below.
Please note: the current platform is unable to support paid events.
Select the third tab: 3. Tickets & Registration
You have the following three ticketing options for your event page.
- You can use your own ticketing and registration platform by adding your ticketing info and external ticketing URL.
- Use the platform’s free ticketing feature to collect registration for your event.
- No ticketing and registration. Your event page will have no registration option and will be informational only.
Option 1: Use Your Own Event Ticketing/Registration Platform
- To use your own ticketing or registration platform, uncheck the “Use Localist Register” to see the following fields to enter your ticketing information.
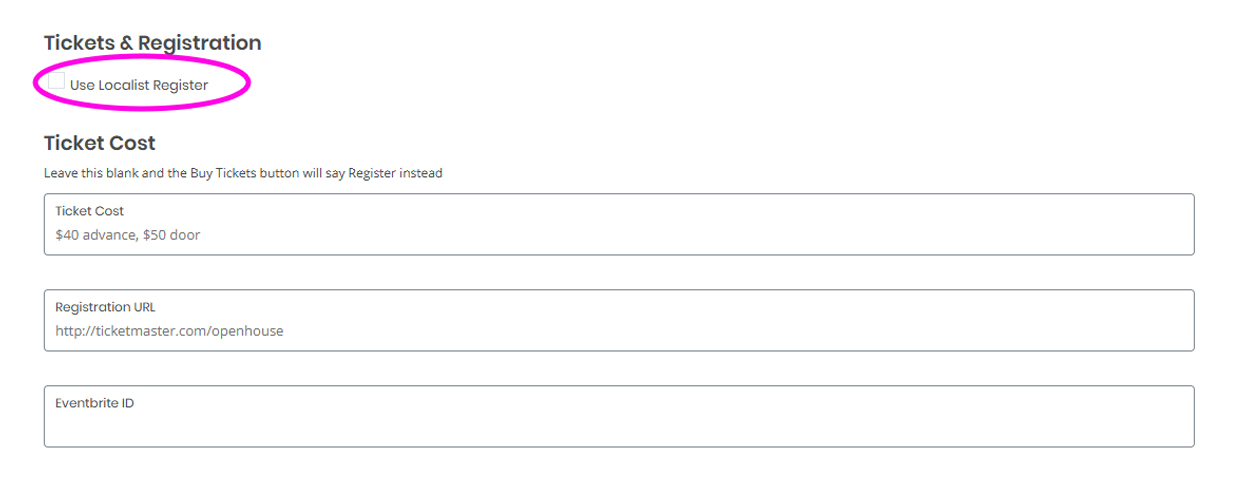
- Enter your ticketing details in the “Ticket Cost” field.
- Important: If you enter the word "Free", the system will automatically label your event as a "Free Event" on the public page.
- To avoid this, consider using terms like "complimentary" instead, or direct attendees to the event description for detailed ticketing information. You can add various ticket options and pricing in the description section within the "Basic Information" tab.
- Enter the URL to your external ticketing/registration page.
- If you have an Eventbrite ID, you can add the ID here to sync to an Eventbrite page.
- Click 'Save and Continue'.
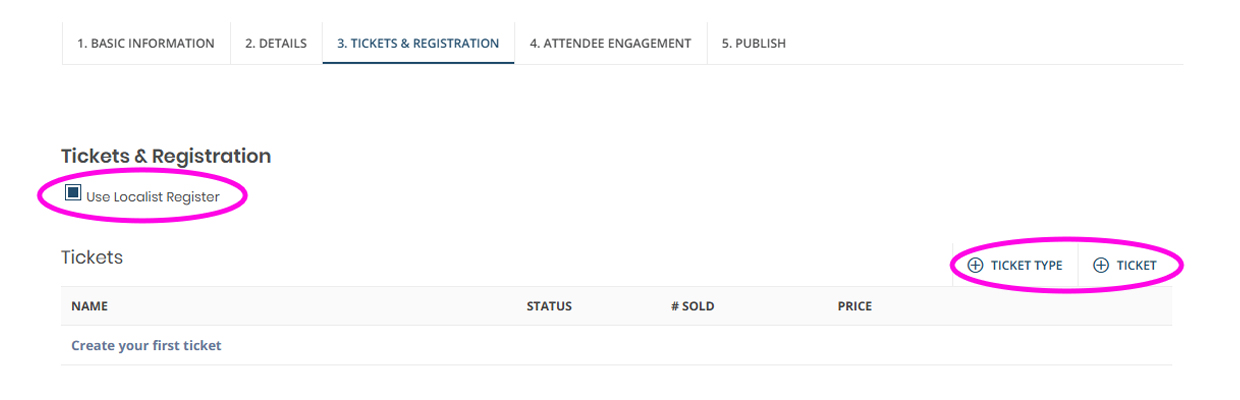
Option 2: Use the Localist Ticketing/Registration Platform
Enable Ticketing and Create Ticket Options
- Ensure that the checkbox “Use Localist Register” is checked. This will enable the ticketing settings.
The current ticketing feature will only support free events and cannot support paid events.
- Click “+ Ticket” to add a ticket option and enter in ticket details.
- You can click “Additional ticket options” under the price field for advanced settings including setting availability date/time range, number of tickets available and also limit the number of tickets each registrant can add.
- While the system does not currently support paid events, you can still take advantage of the promo code feature by clicking on the “Hidden” checkbox. This will allow you to create a promo code that unlocks a hidden ticket option when a user enters it.
- If you have multiple ticketing options and want to organize them in categories, you can add a “Ticket Type” by clicking on “+ Ticket Type” to create categories for your user.
- If you have any hidden tickets, create a promo code and select the associated ticket to use the hidden ticket feature. Click “save promo code” to save code.
- Continue to the “Event Capacity” section to add your registration limit.
- Leave it blank if you do not have a capacity limit.
- Click 'Save and Continue'
Collect User Information
Every event will require a name and email address for each ticket. Note, the same email address can be used for multiple tickets.
To collect additional information click on “+ Attendee Question” in the “Attendee Question” section to add a short open field question or a single select multiple choice dropdown field.
Please note: Conditional fields are currently not available in ticketing.
Visit the Manage Events help page to learn how to manage your registrations including reviewing and emailing registrants.
Option 3: No Ticketing & Registration
- Do not check the “Use Localist Register” box.
- Leave “Ticket Cost”, “Registration Field” and “Eventbrite ID” fields blank.
- Click 'Save and Continue'.
Step guide
Step 3: Registration
Add or create registration.
